
Ruby


Shopify Application Rails engine and generator
This gem includes a Rails Engine and generators for writing Rails applications using the Shopify API. The Engine provides a SessionsController and all the required code for authenticating with a shop via Oauth (other authentication methods are not supported).
The example directory contains an app that was generated with this gem. It also contains sample code demonstrating the usage of the embedded app sdk.
Note: It’s recommended to use this on a new Rails project, so that the generator won’t overwrite/delete some of your files.
Check out this screencast on how to create and deploy a new Shopify App to Heroku in 5 minutes:
https://www.youtube.com/watch?v=yGxeoAHlQOg
Or if you prefer text instructions, the steps in the video are written out here
If you don’t have a Shopify Partner account yet head over to http://shopify.com/partners to create one, you’ll need it before you can start developing apps.
Once you have a Partner account create a new application to get an Api key and other Api credentials. To create a development application set the Application Callback URL to
http://localhost:3000/
and the redirect_uri to
http://localhost:3000/auth/shopify/callback
This way you’ll be able to run the app on your local machine.
Also note, ShopifyApp creates embedded apps by default, so remember to check enabled for the embedded settings.
To get started add shopify_app to your Gemfile and bundle install
# Create a new rails app
$ rails new my_shopify_app
$ cd my_shopify_app

# Add the gem shopify_app to your Gemfile
$ echo "gem 'shopify_app'" >> Gemfile
$ bundle install
Now we are ready to run any of the shopify_app generators. The following section explains the generators and what they can do.
shopify_app is compatible with Rails 5 but since the latest ActiveResource release (4.1) is locked on Rails 4.x, you’ll need to use the unreleased master version:
gem 'shopify_app'
gem 'activeresource', github: 'rails/activeresource'
The default generator will run the install, shop, and home_controller generators. This is the recommended way to start your app.
$ rails generate shopify_app --api_key <your_api_key> --secret <your_app_secret>
$ rails generate shopify_app:install

# or optionally with arguments:

$ rails generate shopify_app:install --api_key <your_api_key> --secret <your_app_secret>
Other options include:
application_name - the name of your appscope - the Oauth access scope required for your app, eg ‘read_products, write_orders’. For more information read the docsembedded - the default is to generate an embedded app, if you want a legacy non-embedded app then set this to false, --embedded falseYou can update any of these settings later on easily, the arguments are simply for convenience.
The generator adds ShopifyApp and the required initializers to the host Rails application.
After running the install generator, you can start your app with bundle exec rails server and install your app by visiting localhost.
$ rails generate shopify_app:shop_model
The install generator doesn’t create any database models for you and if you are starting a new app its quite likely that you will want one (most of our internally developed apps do!). This generator creates a simple shop model and a migration. It also creates a model called SessionStorage which interacts with ShopifyApp::SessionRepository. Check out the later section to learn more about ShopifyApp::SessionRepository
Note that you will need to run rake db:migrate after this generator
$ rails generate shopify_app:home_controller
This generator creates an example home controller and view which fetches and displays products using the ShopifyAPI
$ rails generate shopify_app:app_proxy_controller
This optional generator, not included with the default generator, creates the app proxy controller to handle proxy requests to the app from your shop storefront, modifies ‘config/routes.rb’ with a namespace route, and an example view which displays current shop information using the LiquidAPI
The last group of generators are for your convenience if you want to start overriding code included as part of the Rails engine. For example by default the engine provides a simple SessionController, if you run the rails generate shopify_app:controllers generator then this code gets copied out into your app so you can start adding to it. Routes and views follow the exact same pattern.
Mounting the Engine will provide the basic routes to authenticating a shop with your custom application. It will provide:
| Verb | Route | Action |
|---|---|---|
| GET | ‘/login’ | Login |
| POST | ‘/login’ | Login |
| GET | ‘/auth/shopify/callback’ | Authenticate Callback |
| GET | ‘/logout’ | Logout |
| POST | ‘/webhooks/:type’ | Webhook Callback |
The default routes of the Shopify rails engine, which is mounted to the root, can be altered to mount on a different route. The config/routes.rb can be modified to put these under a nested route (say /app-name) as:
mount ShopifyApp::Engine, at: '/app-name'
This will create the Shopify engine routes under the specified Subdirectory, as a result it will redirect new consumers to /app-name/login and following a similar format for the other engine routes.
To use named routes with the engine so that it can route between the application and the engine’s routes it should be prefixed with main_app or shopify_app.
main_app.login_path # For a named login route on the rails app.

shopify_app.login_path # For the shopify app store login route.
The install generator places your Api credentials directly into the shopify_app initializer which is convenient and fine for development but once your app goes into production your api credentials should not be in source control. When we develop apps we keep our keys in environment variables so a production shopify_app initializer would look like this:
ShopifyApp.configure do |config|
  config.application_name = 'Your app name' # Optional
  config.api_key = ENV['SHOPIFY_CLIENT_API_KEY']
  config.secret = ENV['SHOPIFY_CLIENT_API_SECRET']
  config.scope = 'read_customers, read_orders, write_products'
  config.embedded_app = true
end
ShopifyApp can manage your app’s webhooks for you by setting which webhooks you require in the initializer:
ShopifyApp.configure do |config|
  config.webhooks = [
    {topic: 'carts/update', address: 'example-app.com/webhooks/carts_update'}
  ]
end
When the oauth callback is completed successfully ShopifyApp will queue a background job which will ensure all the specified webhooks exist for that shop. Because this runs on every oauth callback it means your app will always have the webhooks it needs even if the user uninstalls and re-installs the app.
ShopifyApp also provides a WebhooksController that receives webhooks and queues a job based on the webhook url. For example if you register the webhook from above then all you need to do is create a job called CartsUpdateJob. The job will be queued with 2 params shop_domain and webhook which is the webhook body.
If you’d rather implement your own controller then you’ll want to use the WebhookVerfication module to verify your webhooks:
class CustomWebhooksController < ApplicationController
  include ShopifyApp::WebhookVerification

  def carts_update
    SomeJob.perform_later(shopify_domain: shop_domain, webhook: params)
    head :ok
  end
end
The module skips the verify_authenticity_token before_action and adds an action to verify that the webhook came from Shopify.
The WebhooksManager uses ActiveJob, if ActiveJob is not configured then by default Rails will run the jobs inline. However it is highly recommended to configure a proper background processing queue like sidekiq or resque in production.
ShopifyApp can create webhooks for you using the add_webhook generator. This will add the new webhook to your config and create the required job class for you.
rails g shopify_app:add_webhook -t carts/update -a https://example.com/webhooks/carts_update
where -t is the topic and -a is the address the webhook should be sent to.
As with webhooks, ShopifyApp can manage your app’s scripttags for you by setting which scripttags you require in the initializer:
ShopifyApp.configure do |config|
  config.scripttags = [
    {event:'onload', src: 'https://my-shopifyapp.herokuapp.com/fancy.js'}
  ]
end
Scripttags are created in the same way as the Webhooks, with a background job which will create the required scripttags.
ShopifyApp::SessionRepository allows you as a developer to define how your sessions are retrieved and stored for a shop. The SessionRepository is configured using the config/initializers/shopify_session_repository.rb file and can be set to any object that implements self.store(shopify_session) which stores the session and returns a unique identifier and self.retrieve(id) which returns a ShopifyAPI::Session for the passed id. See either the InMemorySessionStore or the SessionStorage module for examples.
If you only run the install generator then by default you will have an in memory store but it won’t work on multi-server environments including Heroku. If you ran all the generators including the shop_model generator then the Shop model itself will be the SessionRepository. If you look at the implementation of the generated shop model you’ll see that this gem provides an activerecord mixin for the SessionRepository. You can use this mixin on any model that responds to shopify_domain and shopify_token.
The engine includes a controller called ShopifyApp::AuthenticatedController which inherits from ApplicationController. It adds some before_filters which ensure the user is authenticated and will redirect to the login page if not. It is best practice to have all controllers that belong to the Shopify part of your app inherit from this controller. The HomeController that is generated already inherits from AuthenticatedController.
The engine provides a mixin for verifying incoming HTTP requests sent via an App Proxy. Any controller that includes ShopifyApp::AppProxyVerification will verify that each request has a valid signature query parameter that is calculated using the other query parameters and the app’s shared secret.
The App Proxy Controller Generator automatically adds the mixin to the generated app_proxy_controller.rb Additional controllers for resources within the App_Proxy namespace, will need to include the mixin like so:
# app/controllers/app_proxy/reviews_controller.rb
class ReviewsController < ApplicationController
  include ShopifyApp::AppProxyVerification
  # ...
end
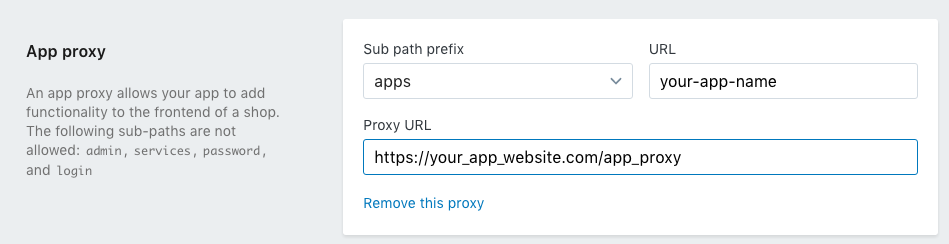
Create your app proxy url in the Shopify Partners’ Dashboard, making sure to point it to https://your_app_website.com/app_proxy.
Rails uses spring by default to speed up development. To run the generator, spring has to be stopped:
$ bundle exec spring stop
Run shopify_app generator again.
By default, loading your embedded app will redirect to the Shopify admin, with the app view loaded in an iframe. If you need to load your app outside of the Shopify admin (e.g., for performance testing), you can change forceRedirect: false to true in ShopifyApp.init block in the embedded_app view. To keep the redirect on in production but off in your development and test environments, you can use:
forceRedirect: <%= Rails.env.development? || Rails.env.test? ? 'false' : 'true' %>
For certain features like Application Proxy or Webhooks to receive requests from Shopify, your app needs to be on a publicly visible URL. This can be a hurdle during development or testing on a local machine. Fortunately, this can be overcome by employing a tunneling service like Forward, RequestBin, ngrok etc. These tools allow you to create a secure tunnel from the public Internet to your local machine.
Tunneling is also useful for working the the embedded app sdk to solve mixed content issues since most tunnles provide ssl.
http://api.shopify.com <= Read up on the possible API calls!
http://ecommerce.shopify.com/c/shopify-apis-and-technology <= Ask questions!
http://docs.shopify.com/api/the-basics/getting-started <= Read the docs!
Copyright (c) 2008 Shopify. Released under the MIT-LICENSE.